iPads! Are They Worth It?

Considering switching to an iPad for music? In our world of screens and digital assistants, using a tablet as a musician might seem like just another electronic distraction. But, there are many important and helpful things these devices can do to make a musician’s life easier! Read on for some helpful tips, apps, and tricks to make the most of your tablet.

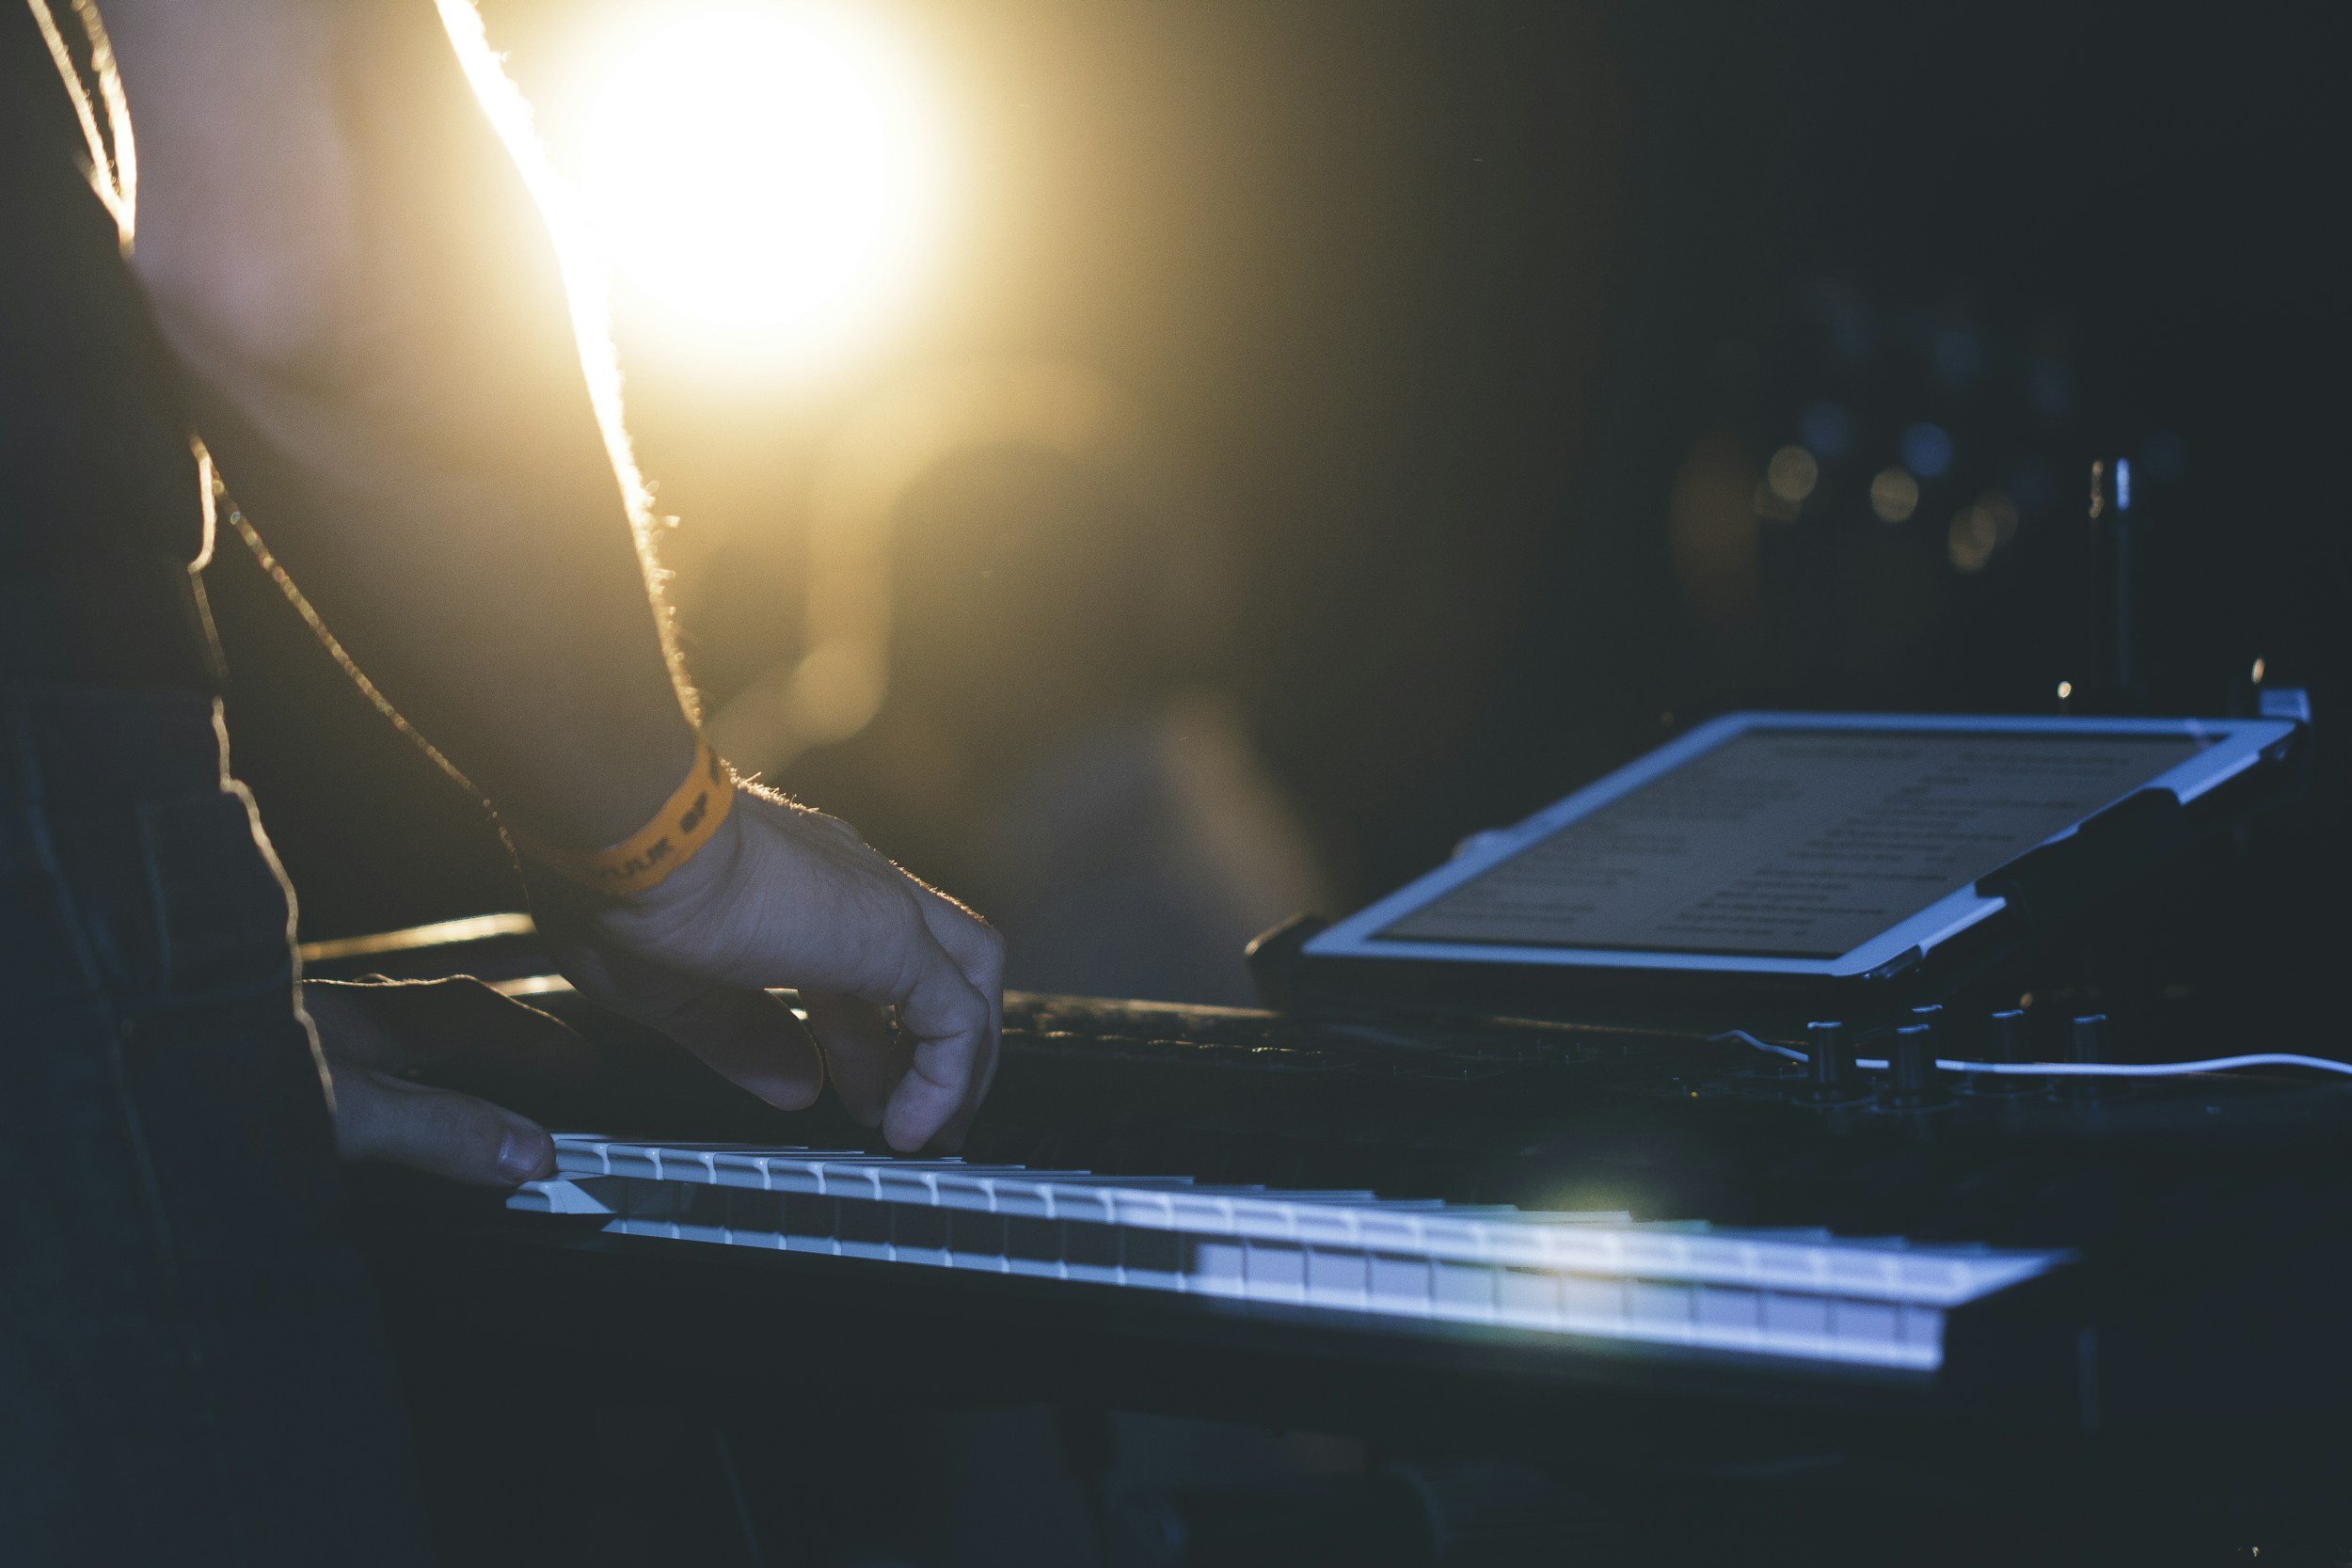
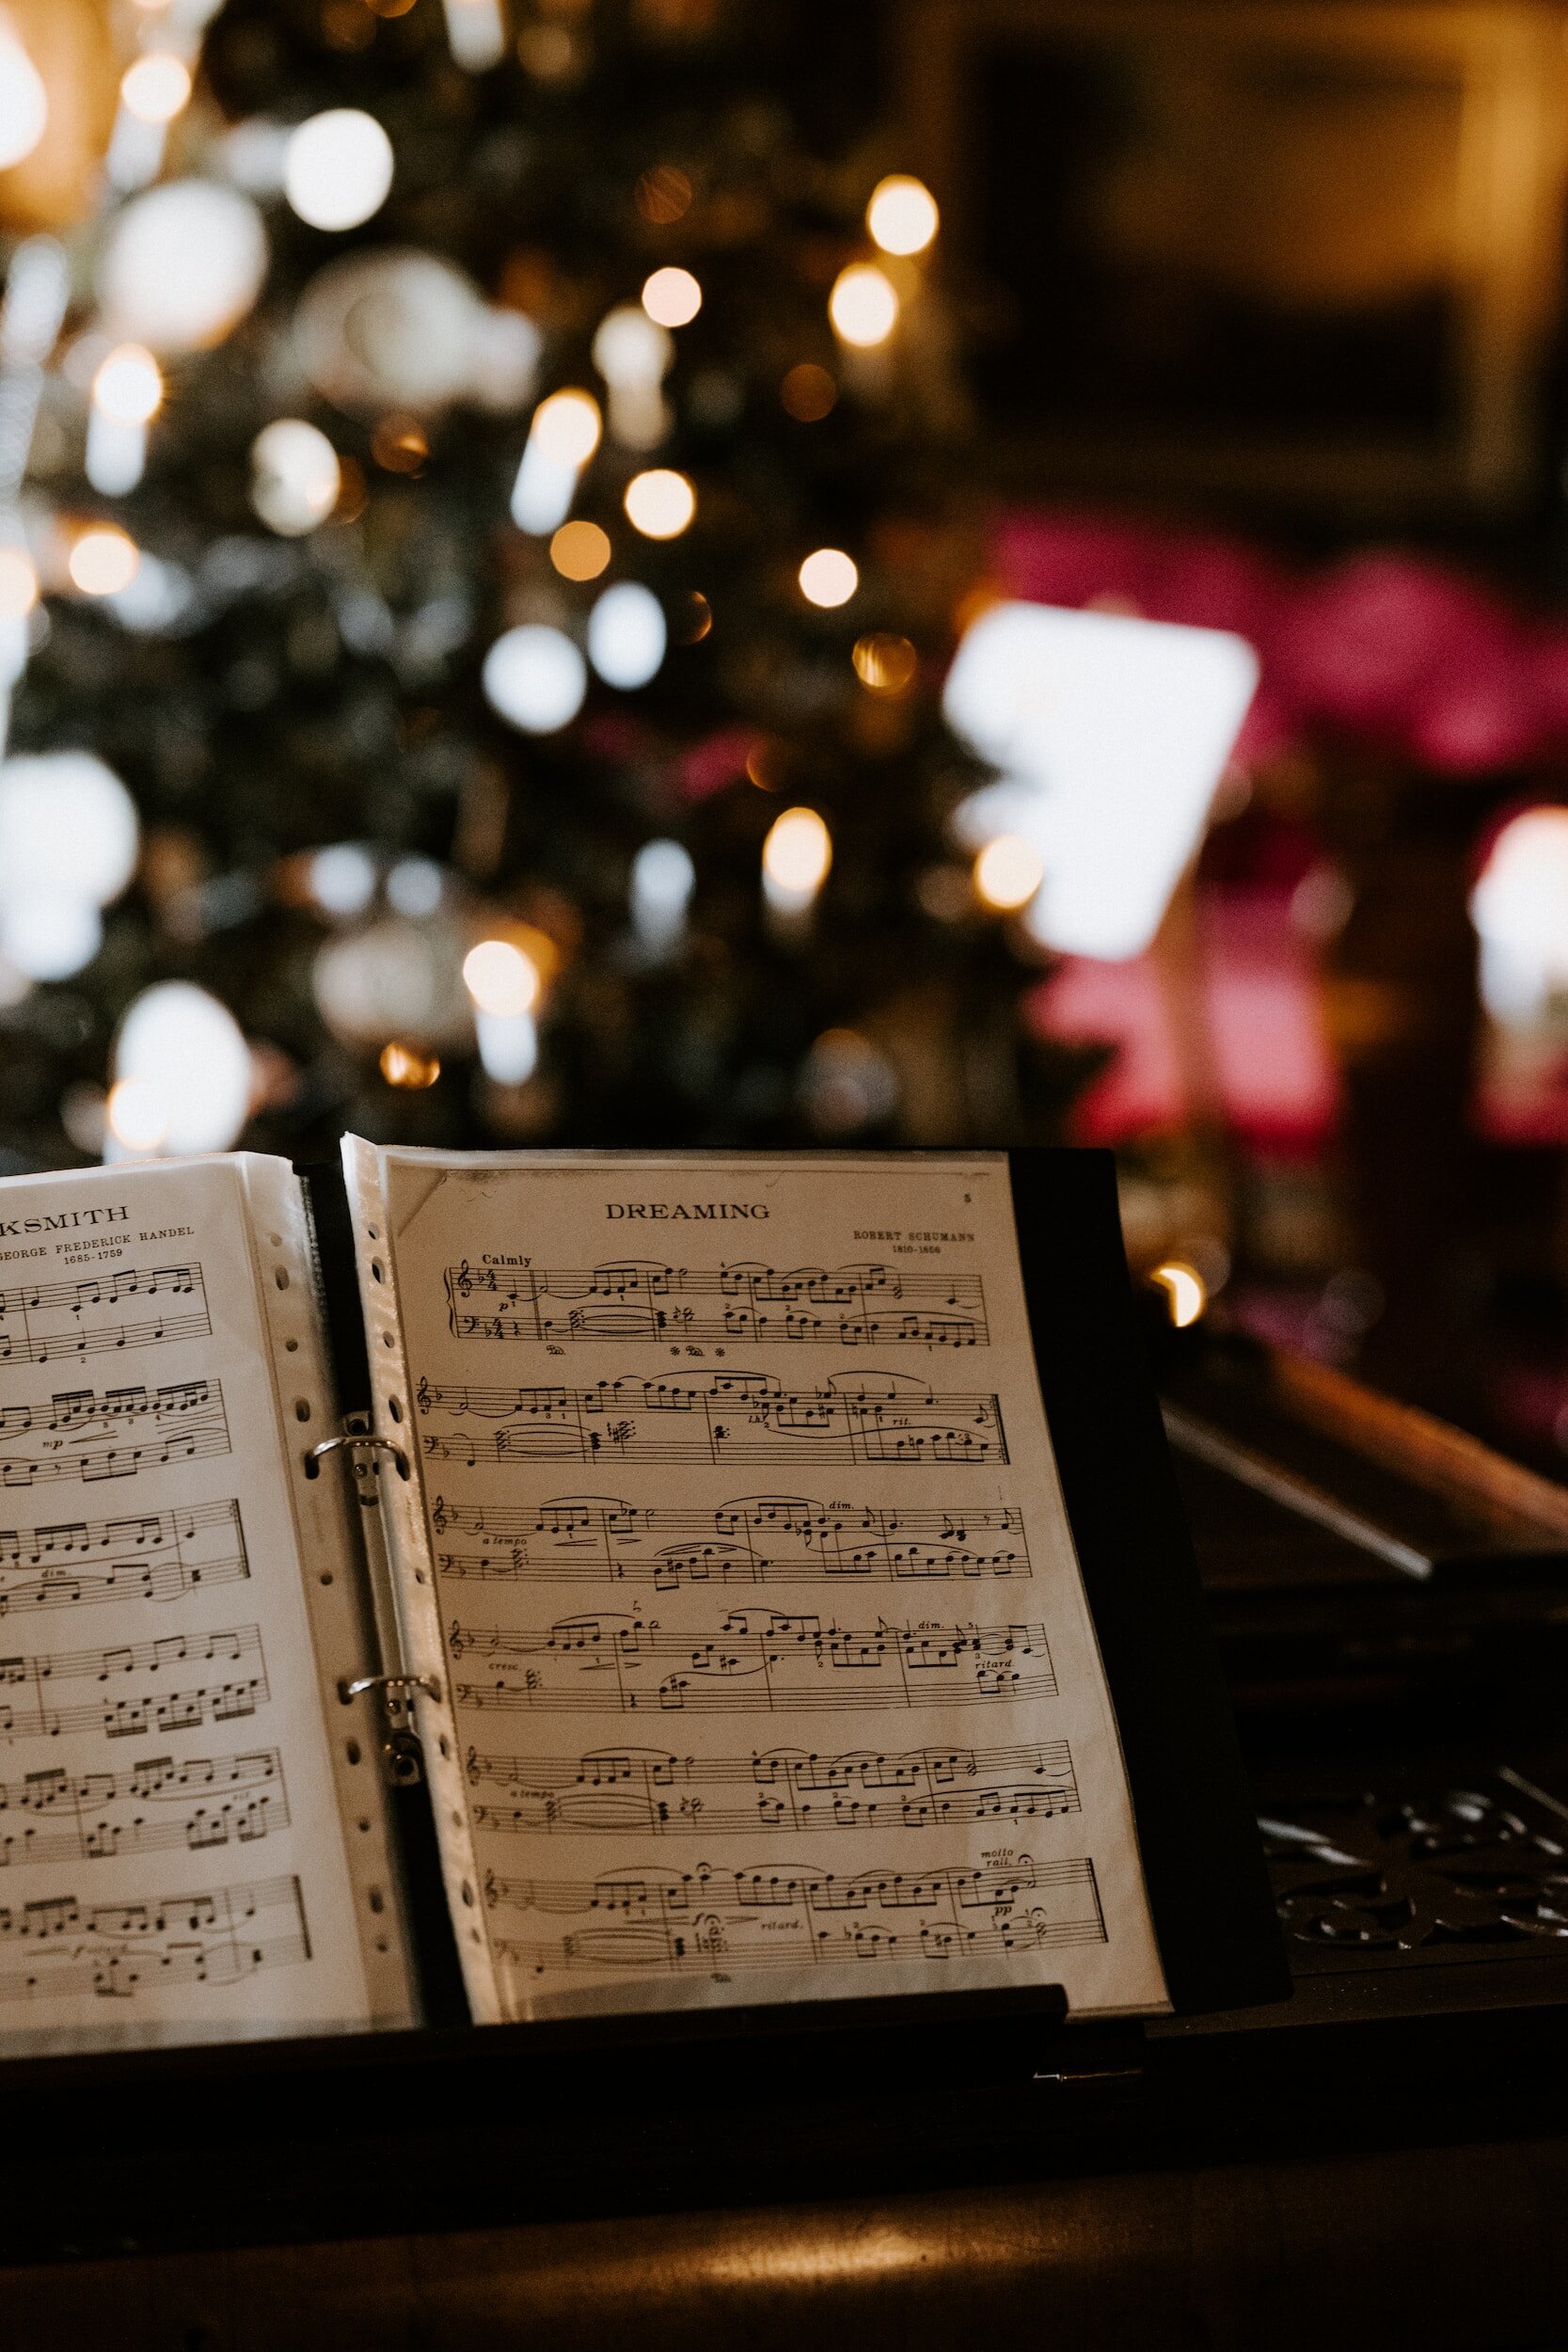
I’ve been a pianist since I was four years old, and have accumulated a veritable TREASURE TROVE of music. Within that time, I have also purchased loads of binders, page protectors, and things of that ilk in order to stay organized and keep my music together. I recently switched over to a tablet which I’ve been using it for about 2 years now, and have had a lot of success with it. Here are the benefits I’ve discovered, along with some of the detriments!

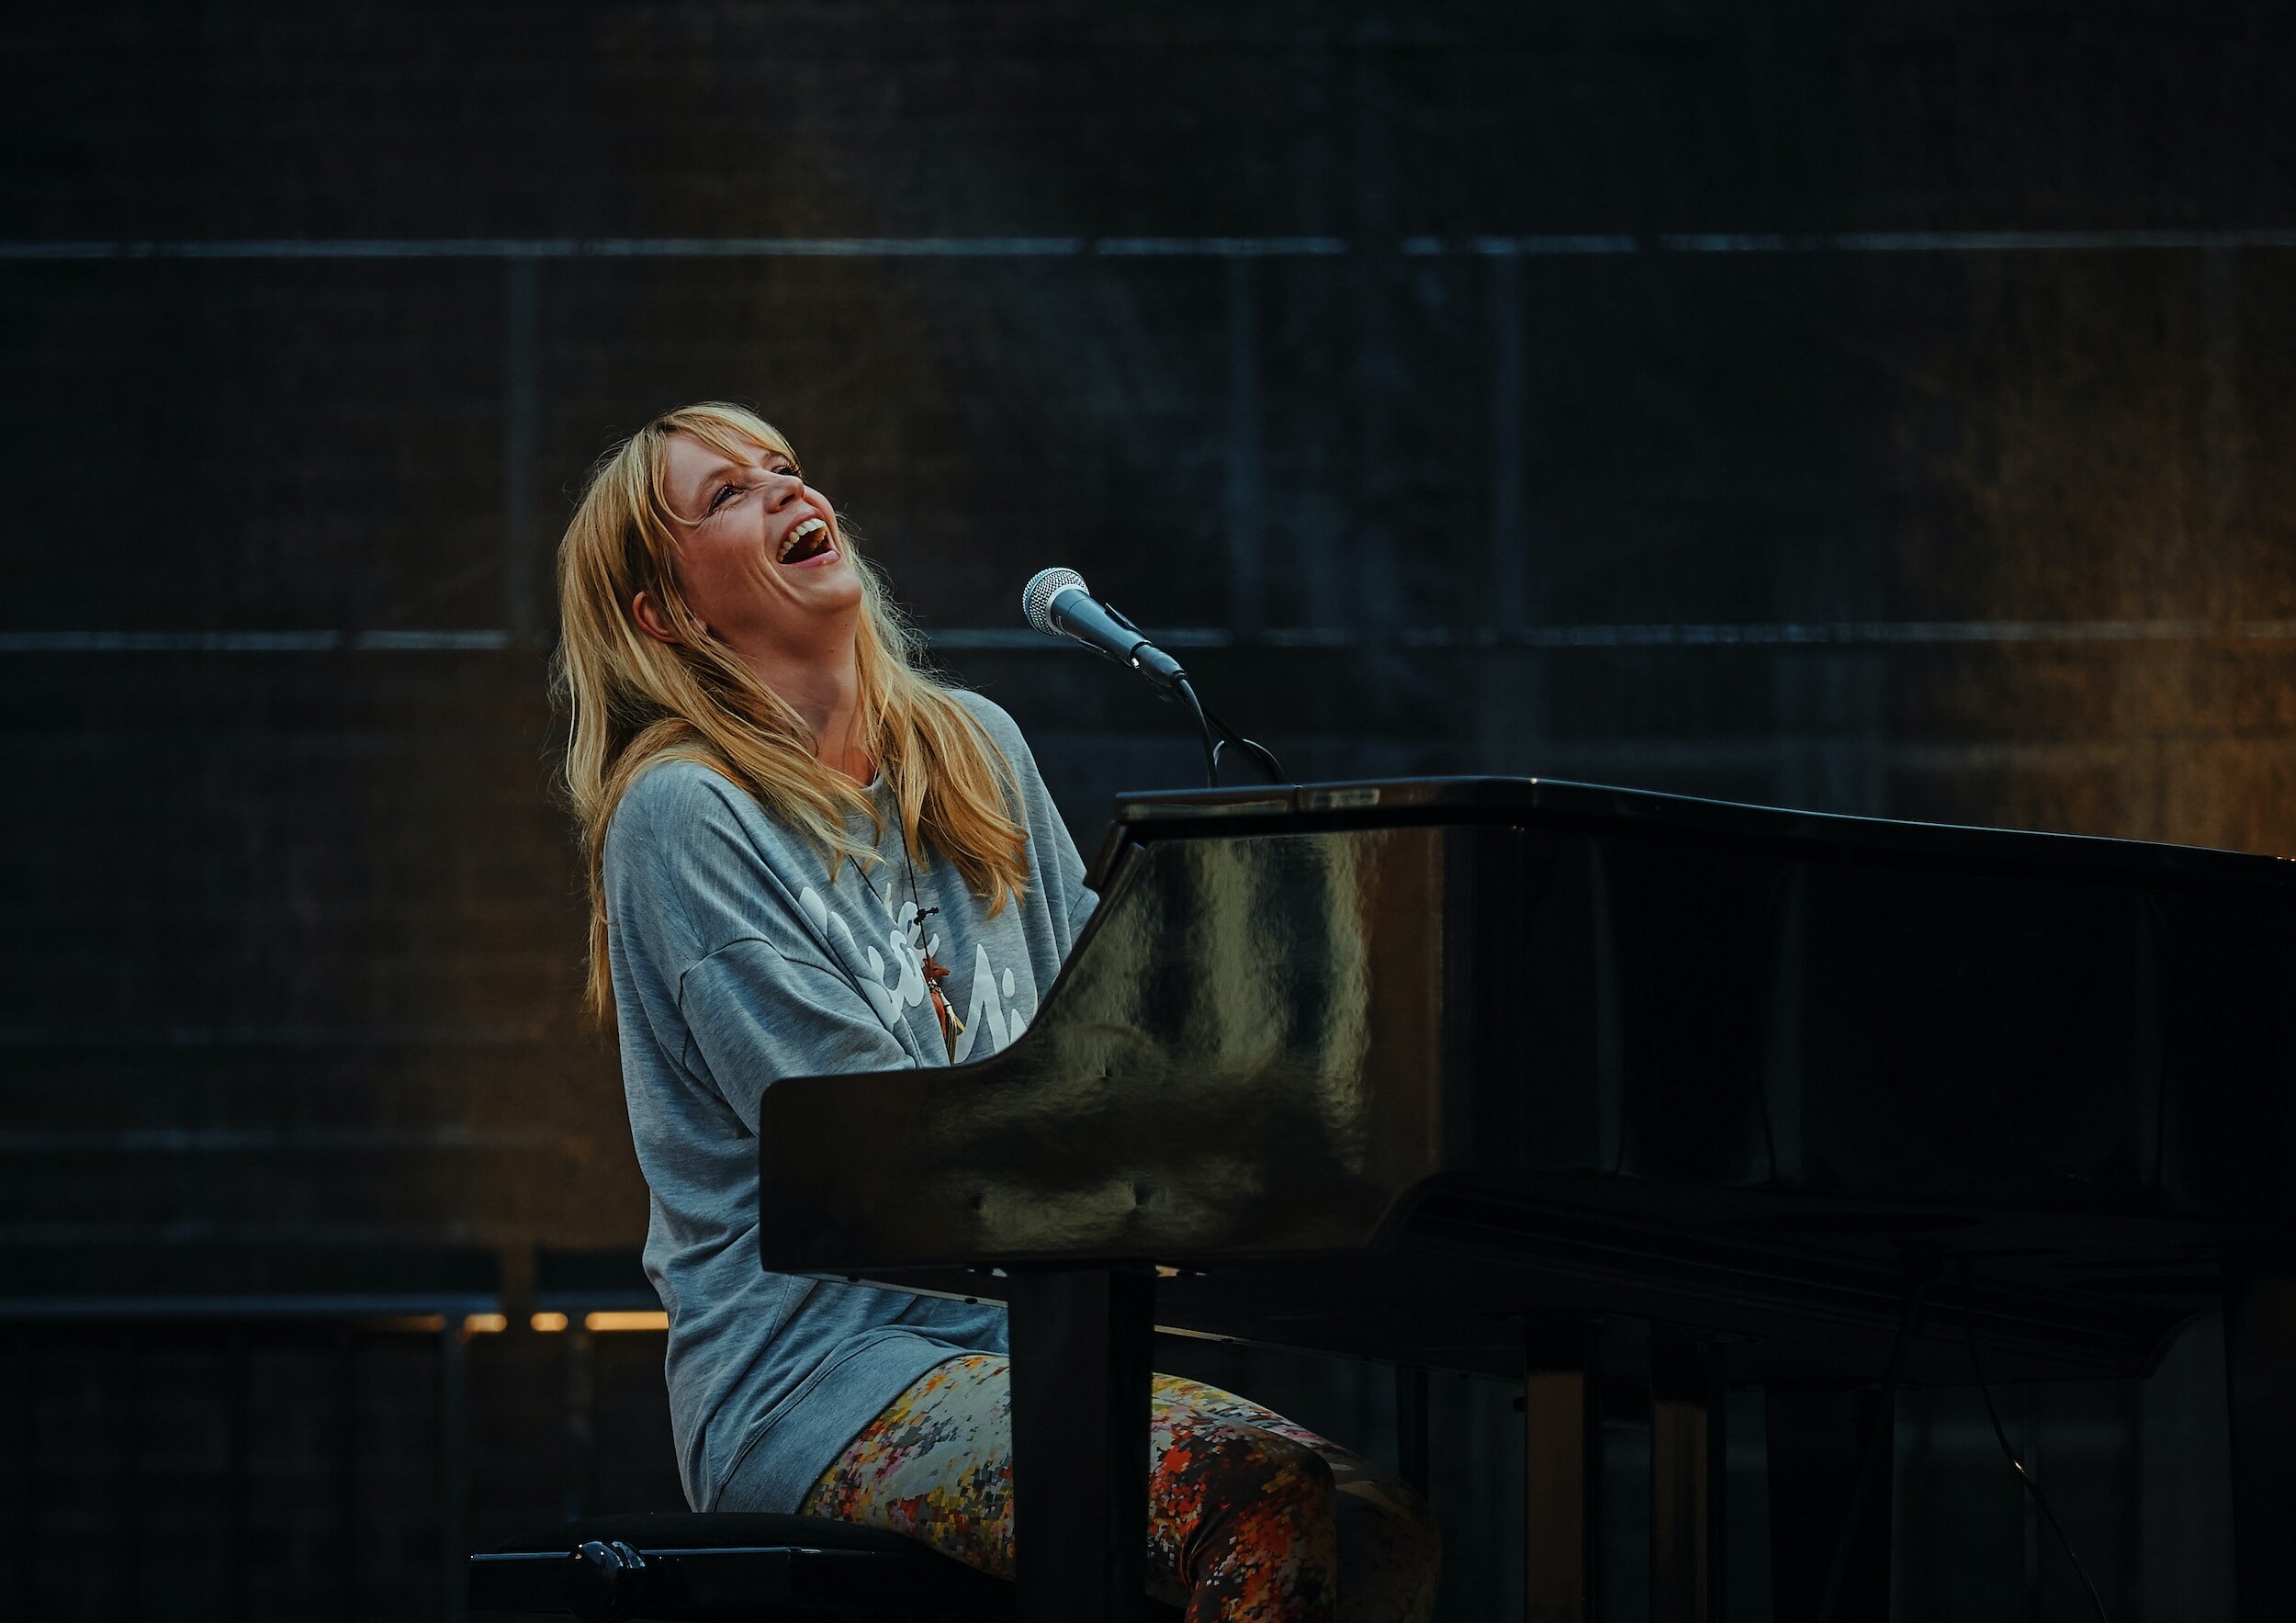
As previously mentioned, I am a professional pianist. I accompany a large high school choir program, and also perform regularly for freelance solo and collaborative gigs. In addition, I’m a church organist and choral accompanist. Trying to stay organized with a binder for each job can be pretty tricky! I’m often part of the new music scene in Indianapolis as well—working with composers means often scores get updated several times before a show. That means multiple copies of the same piece of music, with any markings having to be re-written into the new score. Beyond the mountains of paper, I’ve also encountered issues with page turning. I’ve tried turning pages myself (which as any pianist or keyboard player knows can be tough) with limited success. Sometimes I’ll get a page-turner, but that can lead to its own problems. I recently attended a concert where the page turner accidentally turned too many pages and mixed the pianist up! Nothing like a little extra stress packed on top of performance nerves!

In any case, I’d considered switching over to an iPad for a while and finally decided to bite the bullet and give it a shot. Below are the positive considerations I had and also the main benefits I’ve discovered since switching over.

  • Organization. This is one of the absolute biggest reasons I found the iPad helpful. As I said before, trying to tote around binders for every gig became a huge hassle. Staying organized just didn’t happen with paper music. Now, I put all my scores into setlists for my different gigs. If I’m playing a piece for numerous shows, I can simply drop it into both of those setlists. I’m also able to duplicate or rearrange pages to take care of repeats or things of that nature to avoid flipping back several pages. Plus, I can save music so that I don’t have to go digging around in my library or piano bench every time I need to find an old piece. It’s right there on my device! Finally, all I have to carry around is a slim tablet instead of heavy binders full of paper. Much more convenient!

  • Page turning. As previously discussed, I’ve always had issues with page turning. On both the piano and the organ, it’s really tricky to navigate unless you memorize all your music—something that’s not possible for me most of the time. My iPad allows me to turn my own pages without having to rely on someone else or take my hands off the keyboard. I do use a specific software that enables me to turn pages by twitching my lips, which is kind of crazy. I tried using an additional pedal, but found the coordination really difficult. So, I upgraded the software I was currently using and am now able to turn pages by moving my mouth. In any event, being able to take care of this task without having to stop playing to grab at a page or rely on someone else has been a came changer!

  • Less paper waste! My iPad has been great in terms of not having to recycle stacks of old music or find somewhere to put them when I’m done with a gig. I don’t have to waste time printing, hole-punching, or sleeving any music and I don’t have to figure out what to do with it when I’m finished. I used to put my music in page protectors so it would last longer. But, that meant I had to take it out of the page protector every time I wanted to mark it (which I do a lot), and it also meant extra time fiddling with organization or printing a specific way so as not to waste extra pages. Tablets eliminate the need to print (or reprint) music, which is super helpful in getting rid of clutter and avoiding paper waste.

  • Built in light. Tablets have lit screens! I have some issues with seeing in low light, and using my iPad has helped mitigate that since I can simply turn the screen brightness up. I’ve also been able to increase the size of the music if it’s too small. Now, the light from the screen isn’t bright enough to illuminate the keyboard so if you are playing in total darkness you would still likely need a stand light to see your hands. But, the tablet screen does help in instances of dim or low lights!

  • Instant access to digital music. I’ve played a few church or cocktail party gigs especially around Christmastime where people make requests. Having access to the internet or to a large digital store of music can be incredibly helpful for that. If someone desperately needs to hear “Let It Go” from Frozen, you can just pull up off of Google and play it!

  • Integrated devices. As I’ve written on this blog several times already, distraction is a difficult enemy to face when trying to practice. Using my iPad has been incredibly helpful to stave off distraction as I am able to utilize integrated devices such as a metronome. It’s helpful to have access to my email as well so that I can simply pull up music I’ve been sent instead of having to scan it.

Of course, nothing is perfect. Transitioning over to an iPad does have its problems. Here are some issues I’ve encountered after switching over.

  • EXPENSIVE. iPads are not cheap. I’m not certain about the capabilities of non-Apple devices as I don’t use them myself, but Apple products don’t come without a large price tag. I originally purchased an 11-inch iPad for around $300, which wasn’t horrible. However, I discovered as time went on that it was on the small side and made the music hard to see. I recently upgraded to a 12.9 inch—much easier to see the notes! With a keyboard case (I use my iPad as my laptop as well) the whole cost was around $1000…not a drop in the pond! Now, I use my iPad for everything including grad school and paper writing so the cost was worth it to me. However, if you are considering an iPad just for music it might be too much of an expense.

  • Additional costs. As with any big purchase it seems, you can’t just buy an iPad. You’ll also need a case. I elected to buy one that also has a keyboard, but there are folios or cases specifically for musicians that work very well. I also think a stylus (like an Apple pencil) is really helpful for making marks in the music. You’ll also have to pay for an app or software to store your music, and possibly other hardware such as an iPad stand or a page turning pedal. Some online music services have switched over to subscriptions so these expenses might not just be onetime, depending on the app you go with. All told, tablets are an investment that might be quite sizeable.

  • Battery. One downside to iPads is the fact that you do really have to be aware of battery life. I have been to concerts before where the performer was panicking because they forgot to charge their iPad and showed up to the event with a nearly dead device that had to last for an hour’s worth of music. Not good! Sometimes, older model iPads have terrible battery life and the longer you have your device the less time it can go between charges. Oftentimes, music software can drain batteries quickly as well—you have to be aware of what you have open in order to optimize your device’s battery life. Always make sure your tablet is FULLY CHARGED before a gig, and bring a charger just in case!

  • One page at a time. Even the biggest iPads or tablets aren’t really large enough to display more than one page of music at a time. That means you’ll need to practice how to turn pages on your own. This could entail simply tapping the screen, utilizing a Bluetooth pedal, or a mouth twitch. Practicing this coordination isn’t horrible but it is definitely something to consider before a performance. I’ve had issues sometimes with multiple pages turning at a time because I didn’t have my device set up properly or I hadn’t practiced the coordination enough. Always practice every aspect of a performance, not just the music bit!

  • Notifications/sound. iPads do have the capability to be connected to text messaging, email, apps, and all that good stuff. Though this can be super convenient, it can also cause issues during performances. You will need to make sure your iPad is in silent mode and that notifications are turned off before performing with one. I pretty much always have my iPad in silent mode with most notifications turned off. Putting it in airplane mode works as well. However, this is something to remember, which can be tricky when holding a lot in one’s head before a show.

Well there you have it, folks! iPads are super helpful in my opinion, and I have found that the benefits outweigh the detriments. However, it is very important to take into consideration all of these things when making an investment in an expensive device. If you are accident prone or tend to drop things, an iPad might not be for you! Or you may just need a super heavy-duty case. Before we finish up, I have a few software recommendations that have been extremely helpful to me. One is specifically for tablets, and the other is an app that can be used to help with practice on any device.

  • Forscore. This app is what I use on my iPad for all my music. It has both a onetime purchase option and an upgraded Forscore Pro version. The primary version gives the user access to score rearranging, setlists, and a huge amount of storage space as well as marking capabilities, a digital piano keyboard, and a metronome along with numerous other features. The main reason I upgraded to the Pro version is that this includes hands-free page turning capabilities. I am able to turn pages utilizing the camera with a mouth twitch. You can calibrate the app to recognize your facial movements, head movements, or even shoulder movements. It’s really changed the game for me, and I’d highly recommend it!

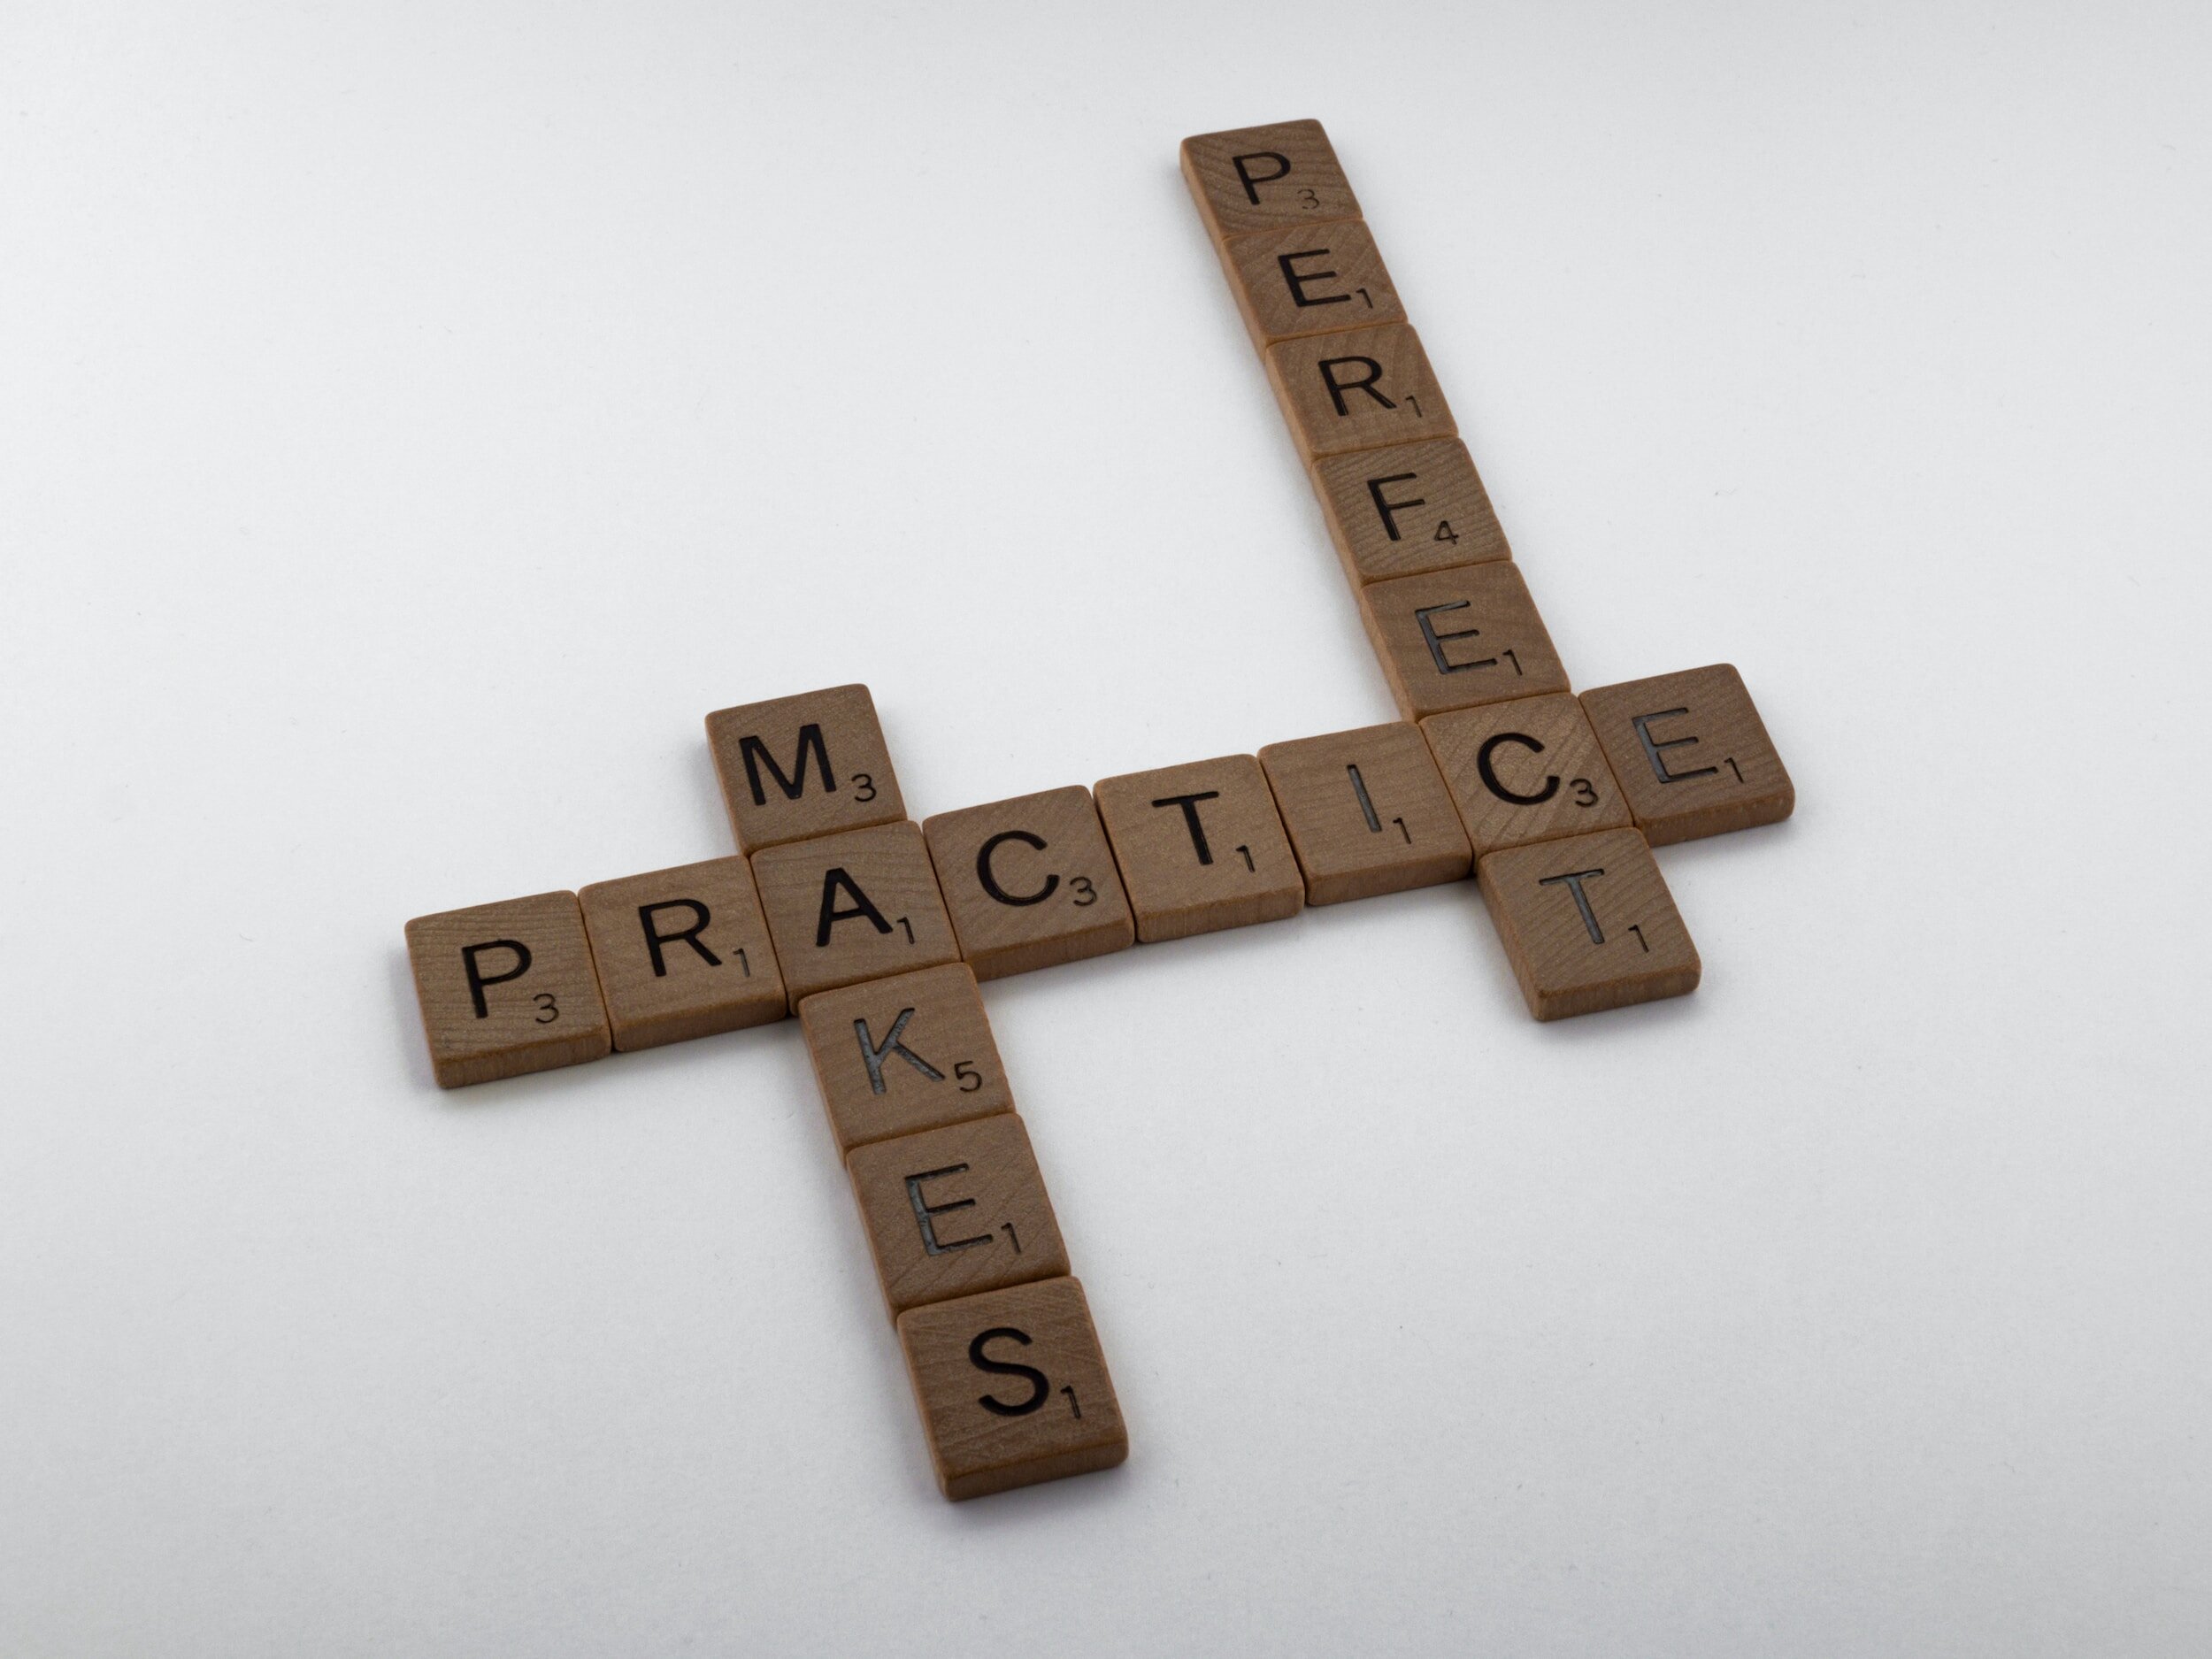
  • Andante. This app can be used on any device as a way of tracking practice and establishing good habits. It functions as a streak tracker, mood gauge, focus indicator, tuner, metronome, recording device, and timer all in one. There is a free version, and a paid version. This app is independently operated, which means there is only a onetime cost right now. I’ve found it super helpful to keep track of which pieces I’m practicing at each session, how long I’m practicing, and how I’m progressing. I love the streak feature, along with the data of how many hours I’ve spent and what times of day I focus the best.

If you’ve made it all the way to the end, thank you for sticking with me! I hope some of this information is helpful to you and best of luck as we finish out the semester!

—Charissa Garrigus, Instructor at Vibe Music Academy

Less Scary, More Merry! Holiday Prep for Musicians

the most wonderful time of the year…or is it?Holidays got you holi-dazed? Take a ginger-breath and try some of these suggestions!

The holidays are almost here! These can be some of the happiest times of the year…and the most stressful. As musicians, it often comes down to us to provide a cozy and festive atmosphere, put on holiday concerts, participate in services, etc. Though all of these events can be absolutely delightful, it can be very difficult to juggle all of these stressors. Read on for some tips on how to do more with less, and get through a busy season while still remaining jolly!

Whether you are a director, a singer, an instrumentalist, or all of those, the holidays can be super overwhelming. I have filled all of these roles at one time or another—running elementary school holiday programs, performing as a cocktail pianist at holiday parties, accompanying church and school choirs, sometimes all in the same week! The holidays are an excellent source of work for professionals musicians, but trying to keep all of those plates in the air can be really hard. Here are a few suggestions that have worked for me to keep everything from catching fire.

  1. Make sure you get your calendar straight in advance, and CONFIRM. There are few things more awkward than double booking. If you’ve been casually asked to perform for an event, make sure that you confirm in writing beforehand with both dates and times as soon as you are able. I’ve had instances occur where I’d casually accepted a gig, and didn’t get the date. Then I’d take on another event, only to discover later that the two conflicted. I’ve also had the opposite happen—I’d have an event planned and prepared for, only to discover the day before that it was cancelled or I was no longer needed. I’d recommend reaching out at least a week in advance, and then following up the day before if this is the first time you’ve participated. It’s not always possible to get all the details immediately upon accepting a gig. However, there is nothing wrong with checking in regularly and getting things nailed down as soon as possible. Your time is valuable and important—don’t let someone else waste it!

  2. When it comes to repertoire, work smarter and not harder! Decide your rep as far in advance as you can, and don’t worry about double dipping. If you run two choirs (perhaps for a church and a school), there is absolutely nothing wrong with using the same music so long as it fits the concert/age group/setting. If you are performing for a Christmas party, and also a background gig, put together a setlist and reuse it—carols don’t get old. I’ve made a set list that I go back to every year. Of course, you may have to pick and choose which pieces fit the venue. Most of the time the standards will work. Once again, there’s nothing wrong with checking in and asking what kind of music would be preferred by the event organizer (if it isn’t you). In my experience, especially with background music gigs, it’s up to the musician. I find that having a mix of sacred and secular music, upbeat and slower material, and major/minor tunes seems to do the trick. You don’t necessarily want everything to sound the same, so make sure you’ve got options. I tend to avoid taking “requests,” but if this is something that could be expected of you try and have those pieces or charts ready in advance.

  3. Start prep as far in advance as you can. As a teacher, I usually like to start working on holiday material in late October. I find that one can never be too prepared! That way there is plenty of time to make sure things are truly ready. I like to let my private students have some input in what they play, though usually that means I give them a few options or have first right of refusal if a pieces seems out of their ability level. As a performer, I’m able to wait a little longer to get started in holiday music. I do like to try and get music sorted out at least a month before performances. It’s also important to think through everything logistically. I’ve had years in which multiple concerts happened on the same day. Plan what time you need to get to the venue, how long it will take you to park, what the setup will be. Thinking through the entire event in advance including timing how long it takes to transition between pieces (this is especially important for different ensembles or age groups if you are directing a school event) makes things run so much more smoothly on the day of the event. Communicate all of this strategizing to anyone who might benefit from knowing it! Make a list of all the materials you will need and prepare them as far in advance as makes sense. If I’m able to get into a venue early, I like to get things prepared as much as I can so that there’s less to think about on concert day. Decide what you/your students will be wearing within plenty of time to locate, clean and/or acquire said clothing. I have definitely encountered events where I didn’t think about what to wear beforehand (or never asked) and then was scrambling the night before to find something appropriate. Whatever the dress code is, think about it and prep your outfit beforehand…and make sure it fits!

  4. You know yourself and/or your students best! For some reason, the holidays seem to bring out lots of opinions. I know I’ve both heard about and experienced lots of “helpful suggestions” that end up complicating things much more than necessary. Trust your gut—will that piece of advice actually make things easier? Do you really believe that person will stick to their commitment? At the end of the day, you only have so much freedom as allowed by the event. However, you are most likely the musical/directorial expert in the room. Take ownership of that! What will work best for your students? What is best for you as a performer? I have noticed that most of the time, making decisions in advance and then communicating those decisions seems to work better than asking for input. Now, that’s not to say you should completely abandon the dictates of the events you are participating in: know what you are singing up for before accepting a gig or position. But once again, after you have been apprised of what is expected of you, you are the expert. Own it!

  5. Do accept help if you need it. As directors, musicians, performers—this season can be a lot to take on. It’s ok to ask for help! Colleagues, family members, fellow musicians, volunteers: oftentimes if you need help, there are people around willing and able to do so. Running large concerts with sometimes hundreds of participants is a lot to do by yourself! There’s nothing wrong with sharing the load. The one point of caution I would make is to communicate your expectations clearly and in advance. Just asking for help and not telling the helper what exactly you want them to do can lead to frustration, miscommunication, or even mistakes. You may have a volunteer with lots of opinions left to their own devices—not always a great situation! If possible, I find it’s helpful to do practice runs with the assistants: have them attend the dress rehearsal, or meet with them separately in advance and make sure they are aware of where they need to be and what they need to do. I also like writing out a script or plan for the whole concert, with stage directions and color coding—very extra I know, but it gives me peace of mind!

  6. Be merry! I think one of the most tricky parts of this whole crazy time of year is that it’s supposed to be fun. I mean it is “the most wonderful time of the year” after all, right? Within the mix of concerts and craziness, try and find some time to soak it all in. Don’t forget to take care of yourself! I know some of these events end up being really fun—I’ve been known to enjoy a delicious hot cocoa or tasty cocktail courtesy of the event organizers. Seeing the smiles on faces as parents watch their little ones sing on stage for the first time, performing an impromptu song with carolers walking by during your gig, watching older couples dance together to your music: it is an amazing gift we have as musicians to bring so much joy to the season. Imagine the holidays without music…it wouldn’t be the same at all. What you do is so important—don’t forget that! You are a huge part of making the holidays merry and bright!

I hope these suggestions take away a little bit of stress from your holiday season. Best of luck and happy holidays! Thanks for reading!

—Charissa Garrigus, Instructor at Vibe Music Academy

Always Prepared: How to Make Performance Prep Less Scary

Upcoming concert giving you goosebumps? Here are a few tips on how to avoid those heebie-jeebies!

As a musician, it’s almost a guarantee that you’ll give a performance at least once in your musical career. These performances can be formal or casual—they may occur in a large hall full of people or in the living room in front of several family members or friends . Big or small, performing can be a scary thing, especially when you’re new to the music world. In this post we’ll be exploring some tips to help you successfully prepare for a formal concert, though you may find some of these suggestions helpful for informal performances as well.

As we’ve discussed in previous posts, nerves are a fact of life. Most musicians have dealt with them at some point or another, and many still experience performance anxiety even after playing their instrument for many years. There are some things you can do, however, to prepare. And preparation will definitely help alleviate a bit of that stress! Read on!

  1. Try and get access to your performance space beforehand and test it out

Each space is a little different when it comes to music. It’s a huge benefit to practice in your performance venue so that you aren’t surprised by things like lights, extraneous noises, spacing…any of that stuff! Decide where you will stand/sit. Are the lights really bright or extra colorful? Does stage feel super hot or cold? How does your instrument sound in the space? The larger the hall, the more loudly you’ll likely need to play unless microphones are involved. If you’re a pianist, or someone who will be playing an instrument provided by the venue, test it out. You really don’t want the first time you play a new instrument to be during your performance! How is the touch? Are the pedals further away that you’re used to? How will you set the bench? It’s even helpful to practice walking onstage and bowing so that you know what to do on the day of the event. If you aren’t able to visit the venue before concert day, make sure to arrive early so you can go through some of these steps before showtime.

2. Make Performance Decisions before concert day

Will you be playing from memory? Will you be standing or sitting when you perform? Make these decisions early and practice them! If you plan to perform standing and usually sit to practice, or vice versa, don’t forget to change it up during practice sessions. How will you stand or sit—what will you do with your feet? If you’re a singer, how will you position your arms? What facial expressions will you use? If you’re using music, will you need someone to turn your pages? Is there a required dress code? I know I’ve run into issues with not deciding in time what I’m going to wear and having to scramble to find something appropriate a day or so before the event. It’s helpful if you know at least a week before what you will need so that you have time to make sure you have it. Ask your teacher in advance what their recommendations or requirements are. Think about all parts of your outfit: shoes, pants, socks, nylons, dress, shirt, jacket, tie…will you wear glasses or contacts? How will you fix your hair so that it doesn’t get in your way? If you plan to wear shoes that might be different from your normal ones, it’s a great idea to practice whilst wearing them…especially if they’re heels. Pianists use their feet to play the pedals and I know from experience the technique is different when wearing heels. Do your sleeves get in the way of your playing? Is your jacket too tight to breathe properly when it’s buttoned? Especially if you’re new to performance, try and think of everything that might be different so that you don’t get thrown off by small things. Wear your performance outfit during a practice session—does it feel good to move in that dress? How are those pants fitting when sitting down?

3. Practice your performance from beginnng to end

One of the biggest differences between practice and performance is the need to play an entire piece without stopping. This can be hard, especially if it’s your first time. It’s essential to practice a full performance and do the best you can not to stop. Have a family member or friend listen to you, and practice playing the whole piece just like you plan to in performance. You can even practice bowing before and after you play just to make sure you don’t forget and that it looks natural. Bowing can be tricky—many teachers are particular about how to bow, so if you aren’t sure go ahead and ask! How will you handle your instrument and/or music when bowing? What about your hair or hands? Facial expression? Audience eye contact? Though these details appear to be small, they can seem really huge when you’re in front of other people. That’s why it’s really necessary to think through and practice all of it early and often so that performance etiquette becomes second nature. The more you practice, the easier it will be!

3. lay everything you will need out the night before the concert

Few things add more to stress levels than not being able to find what you need and showing up late to a performance event. This is one of the easiest ways to eliminate some pre-concert anxiety—find and set out absolutely everything you will need for your performance the night before. And I do mean EVERYTHING! Find your music, your instrument, any instrument accessories (reeds, cork grease, valve oil, rosin, drum sticks, guitar picks…anything at all that you could possibly need), tissues, chapstick, water bottle, shoes, clothes, makeup, hair stuff (clips, elastics, brushes, curlers, hair-ties, etc.), cough drops, purse or bag. Get everything prepared, laid out, and/or packed up and ready to go. Should you follow these suggestions, when it rolls around to performance time, you’ll be all set with no need to panic!

Hopefully these tips will give you the confidence you need to kick those nerves to the curb. Things may still happen during a concert that can’t be planned or prepared for (that’s live performance for you!) but if you do all you can beforehand to get ready, then the likelihood of your performance going off without a hitch is far greater. Keep calm and play on!

—Charissa Garrigus, Instructor at Vibe Music Academy

(Enjoyable) Practice Makes Perfect

What’s the big idea?

Practicing is an essential part of musicianship—in order to improve at playing any instrument, it’s so important to have a consistent habit of practice. However, many musicians struggle to motivate themselves in this regard. Read on for some suggestions on ways to help yourself (or your students) find joy in practice time!

I am sure anyone taking the time to read this blog probably knows (at least to some extent) that practicing is important. In order to become better at ANY skill—be that a sport, a hobby, cooking, gaming, drawing, writing—one MUST spend time actually doing that activity. Many times, music practice falls into the “homework” category for many students. They avoid practice until it’s time to cram for a performance, and treat playing their instrument like a chore. This isn’t necessarily always bad, but it can mean that an actual, healthy practice habit never develops. If that’s you, don’t worry! There’s always time to learn, and that’s the point of today’s article.

I know I have to practice, but I hate doing it…

If that is your initial response, please know: that’s how many people feel at the start. And that’s ok! It’s important to recognize that mindset and be honest with yourself. But that’s not the end of the story, nor is it an excuse not to practice. You just need to figure out how to make practicing work for you! Everyone is motivated by different things and in different ways. Some of us are extremely independent and have no problem “self-starting” and diving deeply into a new activity. Some of us need some help staying focused, or being disciplined, or even getting started in the first place. Regardless of all of this information, you have to start the process by recognizing your own motivational tendencies, strengths, and weaknesses. What is going to help YOU personally make practicing less of a chore? Once you’ve figured that out, do it!

Ok, I get that practicing is important. What can I do so that I don’t hate it?

All right, let’s get into the meat of this post. Here are some suggestions for helping motivate yourself to practice.

  • Refer to my previous post regarding creating a designated musical space in your home. If your practice area is uncomfortable, ineffective, distracting, or inconstant, it will be very hard to motivate yourself. I know that I tend to require a clean space free of visual stressors (like dust piles or dirty clothes) in order to focus the best. Seeing other things that need to be done is one of my own major stumbling blocks when it comes to truly prioritizing my musical work. I enjoy playing the piano: therefore, it should be lower on my priority list because it’s fun. FALSE! Suffice it to say, attempting to keep a clear head in a musical space full of clutter and reminders of other things we don’t want to do can cause us to avoid practice entirely.

  • Practice at the same time of day, and on the same days each week. Just like the first point, having a consistent time as well as a designated space will help in building that habitual structure. After a few sessions, you will start to expect yourself to practice when “Tuesday at 4pm” rolls around! Plus, it allows you to plan for and prioritize your musical learning. I’d even recommend blocking off space in a calendar or planner and making that commitment to yourself. If the decision on how to spend that time is already made, so much the better!

  • Set a timer, or have a clock nearby…NOT YOUR PHONE. I know I’ve written about this before: phones are amazing tools and can be so very helpful. But, they are the WORST when it comes to staying on task. It’s so easy to pick up the phone to “check the time” and end up watching TikTok videos for your allotted hour of practice instead of actually accomplishing anything musical. Instead, set a cooking timer, look at an not-phone-clock, or even set your phone timer and put it in another room with the alarm loud enough that you’ll hear it. That way, we can mitigate at least some of the distractions we might encounter when working on building this new habit. If you routinely use metronomes or tuners, these can be purchased relatively cheaply online or in a local music store—try and use these instead of relying on those phone apps as they do lead to distraction. I’ve done it myself, many a time!

  • Reward yourself! As a teacher, I love finding out what my students enjoy and creating rewards that reflect those things. Rewards don’t have to be tangible—I’ve done sticker charts towards practice goals that accumulate over several weeks and result in a choice of a fun piece, or a duet, or a musical game. Many teachers make use of prizes like candy or toys for young students. If you are a musician yourself, struggling to make yourself sit down and learn that sonata, I encourage you to take some pages from an elementary music teacher’s book. What do you enjoy? How can you acknowledge your success to yourself? How can you congratulate yourself on following through? Make a list! I love drinking tea, so after a practice session I might allow myself a nice cup of Lavender Earl Grey. Or maybe I’ll hit up a coffee shop and get a special chai latte—tastes like success! Other ideas could include an activity that makes you happy: taking a walk, playing some video games, reading a book, listening to a spooky podcast. I also really LOVE the feeling of crossing things off a list. Some people use habit trackers or apps to keep up with “streaks.” If you are motivated by being able to categorically see what you’ve accomplished, add practicing to those lists!

  • Give yourself a brain break. No matter how old or experienced you are, everyone benefits from a brain break. The older you are, the longer you may be able to practice at a session. However, I think it’s pretty much always good at some point during a practice session to take a step away and then come back to your work. It’s like giving your brain a drink of water—it can only do so much work before it gets dehydrated! Movement is an excellent way of resetting both your body and your mind. Stand up and take a lap around your practice space. Do some gentle stretches with you hands, arms, fingers, back, neck, and shoulders. Oftentimes, practicing can entail getting crunched up into one unnatural position for long periods of time. Check that posture! When was the last time you blinked? Close your eyes for a minute so they don’t get dry. Deep breaths are another fantastic way to reset. Breathe in deeply through your nose, and slowly out your mouth. Young students practicing with a helper might benefit from some jumping jacks, a quick riddle repetition, counting, touching their toes…just a few minutes doing something else. Then, when it’s time to start again, the brain will be more engaged, the body will feel better, and the practice session should be more productive on the whole!

  • Have clear goals. What are you working towards this session? Of course you will have larger, longer term goals like working towards a performance or learning a big piece. But, what are you planning to accomplish in this singular practice session? How will you know when you’ve finished? These goals can be as simple as a time allotment, or “play through the whole first page without stopping.” They could also be very complex—deciding artistic phrasing and voicings in a new work, or perfecting specific technical runs using unique fingerings and gestures. Whatever your goals, it helps for them to be measurable and realistic. You likely won’t learn an entire piece in one session. Break it down into small chunks, and choose one specific part to work on per session.

  • Give yourself grace. One of the most important things you can do as you are starting a new habit is to understand that it will take time. You may not reach your goal right away, and that’s perfectly ok. There’s a theory called the Law of Diminishing Returns wherein progress starts to slow as one gets exhausted. If you aren’t used to practicing consistently, you may need to start small. Try to go for 30 minutes without stopping instead of the full hour if you feel yourself starting to fade. Sometimes that extra couple minutes isn’t worth the stress it puts on your body or mind. You probably won’t lose progress, but you almost certainly won’t gain any if you reach this point! Take a brain break, move on to a different section of the piece, or even start working on another piece entirely. Or, if you need to, call it a day! Reflect on your success at coming to your instrument and working towards becoming a better musician: focus on what you did accomplish, and be proud. There’s always tomorrow to get even better!

You’ve Got this!

I hope this post has given you some ideas that might make practicing a bit more enjoyable for you. As musicians, spending time at our instrument is key to becoming better at what we do. There is absolutely nothing, however, that says we have to hate the process. Try some of these strategies to get out of your practice rut, or use them as a jumping off point to begin your practice own habit. Best of luck and happy practicing!

—Charissa Garrigus, Instructor at Vibe Music Academy

Making Space for Music

How should a music studio or practice space look? What are some must have items or requirements for a musical space to be effective? Read on for some tips to create an environment conducive to musical success!

A designated practice space is an essential piece of successful music lessons. In fact, creating a space in a home just for music can increase practice time significantly. However, there are a few different things to consider when designing a studio or music room. Music spaces can be created without breaking the bank, and it’s important to keep in mind both practicality and budget when finding items to include. Read on to see a list of essentials for your music studio!

Important Parts of a Practice Space

When thinking of where to create your music space in your home, try to adhere to at least some of these tips!

  • Find a space that is relatively out of the way, and not going to incur distractions. When practicing or working on music, it’s important to avoid interruptions to both yourself and anyone else you may be cohabiting with. Since ours is the business of sound, spaces that include some sort of sound proofing are excellent—walls with fabric or carpeting on the floor will help to deaden sound. I would also recommend trying to avoid high traffic locations such as kitchens, dining rooms, or living rooms so that you won’t disrupt other goings on in your home. The fact of the matter is that oftentimes, families will keep their piano in a communal space. Should that be the case, attempt to find times during the day where no one else is around or where there will be guaranteed (and uninterrupted) quiet during which to spend a dedicated hour practicing.

  • CLIMATE CONTROL. Instruments can and will be affected by weather. Anything made of wood (pianos, violins, clarinets, etc) can become easily knocked out of tune or even damaged should the instrument be left in areas with extreme temperature changes. Excess heat can cause instruments to warp, whereas too much cold can make an instrument brittle and liable to crack. Now, brass and percussion instruments made for marching band are capable of spending time outside. However, leaving an instrument outside for long periods of time IS NOT GOOD FOR IT. Do not use screened-in porches, patios, or backyards as your primary practice space. These areas might work in a pinch, but are not ideal for long term usage. Plus, you want your music space to be comfortable for you as well. I know I certainly wouldn’t choose to spend much time practicing if I had to be somewhere too cold or too hot!

  • Keep all of your music, materials, music stands, and instrument parts in the same place. There is nothing more frustrating than working up the motivation to accomplish a task and then having to waste time running around sorting out materials before being able to start. Don’t do that to yourself! Make sure that all of your books, music, reeds, INSTRUMENT, and any other necessary supplies are easily accessible in your practice space. This might mean setting aside a particular drawer or shelf near to your practice area to keep all of your music, or leaving it inside a piano bench. Cheap shelving units on Amazon or at Target/Walmart will work as well—just make sure they’re big enough to fit standard music pages. Keep an extra box of reeds handy, and leave your cork grease, slide grease, valve oil, and swabs all in that same spot. Having a timer, clock, or metronome handy may help as well. Whatever object it might be that keeps you from practicing, give it a designated spot in your studio space. It’s also useful to have specific devices that aren’t on your phone—if you use a metronome or tuner often, it might be a good idea to invest in one that isn’t going to force you to get on your phone (and perhaps become hopelessly distracted as a result). Keep these things in your studio space!

Not so essential things that might make your space more enjoyable

If you have the time, budget, and/or desire to personalize your music space, here are some tips I’ve found helpful. These are by no means requirements for a useful music studio, but I’ve found that intentionally creating a space that you enjoy can help with motivating one to actually do the work.

  • Choose somewhere that is well lit. It’s really hard to focus on making music when you can’t see. On the other side of the coin, I tend to prefer gentle, atmospheric lighting that make my eyes comfortable. I like yellow bulbs, lamps, and soft fairy lights so that I feel relaxed. Windows are also a huge plus! Just make sure your space isn’t too dim so that you don’t strain your eyes!

  • Make your body comfortable. Choose a chair that allows for good playing posture, but also is the right height for you. Use a solid music stand that won’t tip all your music onto the floor. Perhaps get an instrument stand so your instrument will be safe if you don’t plan to take it apart between practice sessions. Find an adjustable piano bench that allows your body to hold a posture that is perfect for you.

  • Pay attention to how your studio smells. I’m very tuned in to smells—comes from growing up in a family candle store I believe. I like burning a candle while practicing (safely and away from my instrument, of course) as I feel like it helps me get in the right mindset. Using the same scent each practice session can also help you create a practice habit: each time you smell that scent, your brain will go into practice mode. I also tend to find bad smells distracting: take a sniff of your practice area and if it isn’t pleasant, do what you can with air freshener or a candle to change that! Even a quick vacuum or wipe-down of the walls can make a musty room feel cleaner and smell better.

  • Cozy atmosphere, whimsical furniture, industrial sharpness—configure your area in a way that is pleasing to your taste. I tend towards rugs, plants (not on the piano, of course, unless they’re fake), and natural lighting, but feel free to make your space your own! What sort of music are you going to be making? Can you utilize your space in a way that reflects your personality? Feel free to decorate as well! As long as you’re able to avoid distractions and actually spend the time and do the work, your space can be whatever you want it to be.

Takeaways

To sum up, there’s really no perfect way to set up a practice space. As long as you have all the necessary items in a designated area (and you follow the suggestions above), your studio should be a great place to make music. Happy designing!

—Charissa Garrigus, Instructor at Vibe Music Academy

Meet Your (Music) Teacher!

Gearing up for back to school music lessons? Read on for some tips to make your first lessons back not only productive but fun!

Here we go again!

As August rolls around, so to do the preparations for school. If you and/or your students have chosen to take the summer off, that might also mean getting back into the swing of music lessons. Coming back to lessons after some time off can be a bit difficult. There are quite a few things you can do to prepare yourself for your first lesson after vacation.

If you are a parent of a young music student, you may need take the lead on these tasks. It is essential for young, beginner students to have grownup support especially when they just start. If you’re unsure about what your specific student might need, you can always contact your child’s teacher! Chances are, s/he has experience with beginners and may have some tips to help make music lessons fun and successful.

Try these tips to have a great first lesson!

  • You will likely have to spend some time on old stuff. Be patient with yourself and your teacher! Just like anything, taking an extended break from music making will result in a bit of learning loss. This is nothing to be afraid of! As a student, it’s important to understand not only the likelihood of needing to review concepts from the past, but also the necessity for it. Try not to be frustrated by spending some time going over old pieces or concepts—this is a refresher that will set you up for success during the year.

  • Make sure your instrument is in working order! Especially if you play an instrument that has been sitting in a case all summer, ascertain whether it is in proper playing condition before you head to your first lesson. If you are a string player, check those strings! Do you have picks, rosin, tuners, a bow? If you are a wind player, are your slides functioning? Do all the corks and pads still seal each part of the instrument? Double check your supplies: working reeds, cork grease, slide grease, polish, swabs, cleaning cloths…nothing is more frustrating than a lesson that can’t get off the ground simply because the instrument doesn’t work, or you don’t have what you need. If you are pianist, do you have an instrument to practice on? Is your home piano in tune, or does your keyboard still work?

  • Find your music. What pieces or method book did you finish with at the start of the summer? If you are just beginning lessons, or transitioning to a new teacher, take your previous books to your lesson or ask your teacher in advance what sort of materials s/he would like you to have. It’s difficult to have a lesson without a baseline, and your most recent music will provide that jumping off point.

  • Have some goals or ideas that you are excited to work towards. Oftentimes, your studio will have performances to prepare for. Or, your school might offer access to solo and ensemble performance competitions. These are fantastic, but what will make you happy in lessons? Is there a particular aspect of your instrument you want to focus on this year? Do you want to start learning a new style of playing, or perhaps try out improv or composition? Is there a specific composer/artist/piece that you’d like to learn? Giving your teacher some insight into how s/he can help you succeed will really help your teacher tailor your lessons to you!

  • Prepare a practice space, and start scheduling in some practice time. Even if you aren’t starting lessons right away, it’s a good idea to make sure you have time set aside in your schedule for practice. No practice means no progress! If you don’t plan for it, it most likely won’t happen. So, make a plan as early as you can!

  • Get in touch with your teacher. See what your teacher needs from you to make your first lesson a blast! Depending on who you are studying with, your teacher might have some specific requests or items you’ll need to bring with you. Many teachers ask students to use particular method books, or to bring a notebook to lessons so that practice notes can be written. Some teachers require pencils, or particular stickers for your instrument—some teachers don’t want you to bring anything at all except yourself and your instrument. Go ahead and shoot an email, text or call to your teacher and check in—you and your teacher are a team, and the best way to get on the same page is to start a dialogue. Familiarize yourself with your studio’s policies, as well. Oftentimes, questions can be answered by visiting a studio’s webpage or social media so it never hurts to make sure you’ve gotten on any email lists, followed social media, joined newsletters, or any of those things. One can never be too prepared!

  • Lastly, start getting excited! Music lessons are an amazing opportunity to learn a skill that you will have for the rest of your life. Once you’ve done the prep work, there’s nothing else to worry about aside from getting pumped!

It’s going to be a great year of music, and from all of us here at Vibe: have a wonderful “back to school” whenever that is for you! We wish you and your (music) teachers all the best this academic year. Thank you for reading!

—Charissa Garrigus, Instructor at Vibe Music Academy

Major Decisions…what’s the key?

Considering a degree in music? What can you do with such a specialized education? The answer is, lots of things! In this week’s blog post, I will share some of my own experiences as a college-educated musician and some of the opportunities open to potential college music students.

Before getting into the meat of today’s post, I do have to include a small disclaimer. No two musician’s journeys are the same! If your musical career has been different, that’s perfectly acceptable! This is just my personal experience and what I have witness in the lives of my colleagues.

Now that’s out of the way, let me tell you a bit about my own musical journey. I knew in high school that I loved music enough I wanted to make it the focus of my career. I’d taken piano lessons from a young age and played clarinet in the school band. I decided to go to college for music education, and graduated from UIndy in 2018. From there, I went straight into teaching full time as an elementary general music educator, and band/choir director. During this time, performance was still a big part of my passion. My husband and I started a non-profit called Sound Ecologies in 2020 focused on providing local musicians and composers opportunities to write and perform in benefit concerts raising awareness about environmental issues. We’ve also given concerts and done recordings with Classical Music Indy and several other Indy non-profits such as Spark and Big Car. I’ve worked as an accompanist and organist at several churches in the Indianapolis area, and done quite a bit of accompanying for choirs and soloists at schools and concerts. This year, I’m transitioning into being an accompanist at an area high school along with going to school for a Masters in Musicology. And I feel like I’m just getting started!

My point in mentioning all of this is that music degrees are worth getting. Many colleagues of mine went to school for Music Technology and Recording Degrees and now work with studios, or earned degrees in composition, music therapy, and even performance. Some have gone on to further schooling, some have become music directors at churches, and some have become full time performers or educators, or arts administrators. There are so many options open to college-educated musicians!

So, what are the degree programs available to anyone considering going to school for music? I will lay out the most common options below. Some schools offer all of these, some don’t. But, knowing what you would like to study (at least, to an extent) is a great place to start!

  • Music Performance: These degrees tend to be focused on private lessons, masterclasses, and lots of performance practice opportunities. If you are considering a degree in this field, be prepared to spend lots of time in the practice room! Most programs for performance will also include required music theory and history classes, but the main focus is on learning your instrument to the best possible standard of which you are capable. If you are thinking of auditioning for a performance program, make sure you are familiar with the teachers at your institution of choice and perhaps even try for a demo lesson. The style and teaching technique of your applied instrument instructor will really determine your success!

  • Music Education: These degrees can vary in certification depending on the university or college you attend. However, most programs include a certification in K-12 general music and then a specialization in either instrumental or choral education. You will likely still have a primary instrument and applied lessons, as well as ensemble requirements. Most education programs also include a heavy emphasis on performance practice, history, and theory. But, you are also taking educational psychology, pedagogy, and practicum classes as well. I’d recommend choosing a program that gets you into a classroom for some experience as soon as you can so you can discover the age groups you are most successful with, and whether teaching is for you. You will need to complete at least a semester (if not a year) of student teaching as well in order to graduate.

  • Music Technology/Business/Recording: This field tends to focus more on the operational music industry. Some institutions have degrees that combine all of these specialties, while others will separate them into different concentrations or programs. However, the emphasis tends to lie on spending time in a studio, learning the ins and outs of recording technology and arts administration. Some programs such as these offer internships which allow for on-the-job experience. These degrees tend to be less performance focused, but many universities will still require students to give recitals and/or take lessons with a primary instrument. There may be ensemble requirements as well, depending on the college. Always do your program research!

  • Music Therapy: Vibe Music Academy’s own Abigail Long is much better suited to answering questions regarding this field, as she is a professional Music Therapist! Although primarily a graduate program, more universities are beginning to offer Music Therapy courses to undergraduates. These degrees enable musicians to interact with children and adults who benefit from music as a form of therapy—whether that is sensory, psychological, or otherwise. Music therapists might work independently, or with a school or retirement community to provide activities and services to both individuals and groups.

  • Music Theory/Musicology: These types of degrees are generally more of the graduate level, but some colleges do offer them for undergraduate students. I know for my current graduate courses, Musicology consists of lots of research, history/theory classes, and paper writing. In undergraduate courses, one would still most likely need a primary instrument and still be enrolled in private lessons and ensembles as well.

  • Composition: These degrees generally are available as undergraduate concentrations or graduate degrees. Once again, the focus will likely be on a well-rounded music education with private lessons, ensemble playing, and music history and theory. However, these programs also usually offer private composition lessons, composers’ forums, and performance opportunities for a student’s works. Additionally, many universities will have a composition student give a recital of his or her own works (either performed by the composer or other music students) instead of an individual performance recital.

To sum up this extensive post, there are lots of options open to anyone considering a career path in music, and you may not end up where you think! If you know you want to pursue music in college, but don’t want to major it in, most universities still offer private lessons, music classes, and some ensembles to non-majors as well. But if you know that music is your passion, there are numerous ways to funnel that passion into a profitable and enjoyable career. Thank you for reading, and best of luck in your music educational endeavors!

—Charissa Garrigus, Instructor at Vibe Music Academy

A Beginner’s Guide to Writing Program Notes

What are program notes and what are the benefits of writing them? This week’s post will give you all of this information and more, so read on!

what are program notes?

Imagine you are attending a live classical music concert. You receive your program and flip through as the orchestra is turning up. While you wait, you read some information on each musical piece regarding the composers, the inspiration behind the work, and the music itself. These are program notes!

The practice of researching the music one is studying and writing about it to inform the audience has been around for ages. Some dedicated program note enthusiasts even go on to become professional writers dealing with music history and analysis. Though this might seem a bit advanced for younger students, it is something intermediate to advanced young musicians stand to benefit from greatly. The backgrounds and histories of the pieces being prepared can influence musical interpretation, style, and even technique in some cases. Learning about the history behind a work and the significance it may have held to the composers or to the time period during which it was written is an essential part of studying a piece of music.

As a music educator, it is very important to do your research on the pieces you are choosing for your students to learn. Make sure you select works from all sorts of varying time periods, and include pieces by all sorts of different composers. When a student sees him or herself represented by a composer or performer, it can build so much confidence. Representation is important!

Now, on to the process of writing these aforementioned notes!

So, how does one write program notes?

These can be as simple or complex as a student is ready for. I’ll lay out the basic form for writing these notes—feel free to change and add on as you see fit!

Most beginner notes can be about a paragraph in length. There is no need to write an entire essay, especially when considering how these notes might look in a paper program. Notes can include any of the following bullet points:

  • Title of the work (usually in bold) and composer name. These are required, but the rest is up to interpretation.

  • A brief history of the work. Maybe a sentence or two about when the composer wrote the piece such as the year, date it was published, how it fits into that composer’s catalogue, even perhaps the significance this work may have had to the composer. Was this her first work for solo piano? Did this song have a special importance to him as a songwriter? These topics can lead to great discussions in lessons—feel free to write these notes along with your younger students as well. This could be the context of a lesson!

  • Musical details about what the audience can expect as listeners. What musical devices make this piece unique? Are there any particularly beautiful moments? What might surprise the audience? For beginning writers, this would be a great section to utilize music vocabulary terms, especially tempo and dynamic words.

  • Any final thoughts! What does the performer enjoy most about this piece? Is it special to him or her in some way? What have they learned as a result of studying this work? This would be an excellent place for a dedication or something along those lines as well.

Of course, writing detailed program notes for every piece studied in lessons might seem like too much, and that’s perfectly valid. These notes could also simply serve as discussion topics for introducing a new piece in a lesson—they don’t necessarily have to be written down at all. However, I’d encourage teachers (particularly if you have rather advanced students) to try these techniques out and see what happens. Who knows, you might just be teaching the world’s next great musicologist!

—Charissa Garrigus, Instructor at Vibe Music Academy

Summer Fun with Music Lessons!

Summer is here! It’s the season of beach holidays, vacations, mixed-up schedules, lazy days, sunburns, and hopefully loads of fun. Oftentimes, we use summer as a time to rest and relax, which is an essential practice. However, keeping up with private lessons over the summer can make a huge difference in the musical education of your student. Below, I will outline some huge benefits of keeping a student in lessons over the summer.

Perhaps the biggest asset to keeping up with music lessons over the summer involves learning loss. When outside of a formal education setting for an extended period of time, students lose the ability to utilize the skills they’d been building up. This can result in those skills diminishing or even disappearing. When returning to lessons in the fall, skill loss can create the need to re-learn those skills. This is not, on the whole, a bad thing. Review can do wonderful things for a student! However, some students may find this process frustrating. Additionally, much of learning an instrument involves muscle memory and the building up of techniques (and calluses, for string players) that take lots of time to perfect. Taking a step away from an instrument for an entire summer means the loss of this muscle memory. If one considers instrumental practice similarly to an athletic activity, there is just as much a need for “summer conditioning” in music as there is in sports—the difference is that musical conditioning can be as easy as keeping up with a practice schedule or at least occasional lessons.

Another helpful piece that comes from taking summer lessons, especially for a student whose schedule is filled with extra-curricular activities, is getting ahead! Keeping up with summer lessons, instead of just combatting learning loss, can boost a student’s skill acquisition. Students who have a loaded schedule during the year can benefit from keeping up with some sense of balance over the summer. Time management and a sense of accomplishment during these long summer days are certainly a bonus! Plus, getting started on performance prep over the summer prepares students for less stress during the school year. The summer is also an excellent time for experimentation. If a student is considering learning a new instrument or taking up a new musical style or genre, this is a great time to try something out with that extra flexibility. Perhaps this would even be the perfect time to get a start on composing or writing new music!

To conclude, taking lessons over the summer can be a wonderful way of keeping your student engaged in music. Summer lessons can lead to:

  • Less learning loss! No more worrying about rebuilding technique or calluses once the summer ends.

  • Getting ahead for a busy school year. Start on that performance preparation early to avoid stress later!

  • Stay on track with time management and a regular sense of accomplishment.

  • Take time to experiment—try out a new instrument, a different style of music, or composition!

Thank you for taking the time to read, and I hope you have a fabulous summer! Enjoy those summer lessons!

Author: Charissa Garrigus

You Too Can Be a Video Game Composer!

Looking for new things to try out this summer? This blog will discuss some easy, free digital music composition resources to get you started!

You don’t have to be a professional audio technician to make great digital music!

A New Summer Pursuit?

As the school year begins to wrap up, many of us may be on the lookout for new and engaging resources to entertain our kiddos and/or students this summer. Let me recommend digital music composition! As a general music teacher, I have experimented with lots of different activities and lessons over the years in an attempt to teach important skills and standards while keeping students excited about music. Using digital music creation sites has been wildly successful in that area, and has allowed some students who aren’t a part of performance ensembles to shine.

There are numerous free resources that educators can use to demonstrate digital music composition for their students. I generally pair these activities with information on film scores or video game history, as it creates a touchstone for students to understand the importance of soundtracks. It can also give them a jumping-off point when making their own tracks. I try to keep assessments pretty general so that students have lots of opportunities to write what they enjoy or sounds good to them. But, I do give some parameters so as to avoid the “curse of the blank page.”

Below, I will include a list of the sites I have used along with the age ranges and technological capacity that tends to be necessary. Most of these sites are convertible between Mac or other devices, but some programs (such as Garageband) are exclusive to specific brands.

Teaching students the relevance of soundtrack music is a wonderful way to take something most kids do (watching movies, playing video games, etc.) and turn it into an educational experience. I like to encourage meeting students where they are—when we discuss the genesis of 8-bit music in 7th grade, students already understand at least some of what we discuss since they encounter these things in their daily lives. That way, when asked the age-old question “When are we going to use this in our real lives?” one can point out that they already do! Does the music in a video game make the experience more immersive? Imagine watching a favorite show or movie with no music—would Darth Vader be as scary without his theme song?

I also believe that allowing students to take the reins and be creative goes a long way in building lifelong musicians. In the music classroom or studio, we have the capacity to allow for hands-on work and individual artistry that isn’t available in many other classes. With composition, I try to provide the tools and some examples and then give students time to experiment and play around with the sounds. As previously mentioned, providing guidelines is important, but I try to keep them minimal so as to allow students the individual capability to create.

Pretty much all of the music composition resources below can be accessed with any sort of computer—no plugins or synth keyboards required!

Digital Music Resources Anyone Can Use!

I have used nearly all the following resources in my middle school general music classes. Some might be a bit tricky to use with elementary students (depending on age and capability), and most offer a free option. I’d recommend familiarizing yourself with the ins and outs of the site before assigning or using it in lessons just in case there are questions from your students. Have fun!

  • Chrome Music Lab: https://musiclab.chromeexperiments.com/Experiments This site is free and very easy to use. There are numerous “Experiments” available, and this is a fabulous site to use for scavenger hunts. The Songmaker experiment is a very simple clickable song creator that does allow for an exportable URL. However, that URL does have to be kept somewhere (I usually have students email it to themselves) or the work will disappear.

  • Beepbox: https://www.beepbox.co (or just google Beepbox) This site is a fantastic way to discuss Chiptune music. The interface is a bit more complex than Chrome Music Lab, and there are many more instrument and customization options. I’d recommend really digging into the site on your own before introducing it to students. Simply scrolling down on the landing page will also show instructions and include some links to songs that have been created. I love using this website after talking about video game music.

  • Audiotool: https://www.audiotool.com/ This site is free, but it does require a signup. I had limited success with Audiotool when using it with my middle school students as it’s not quite as user friendly as other sites. However, this is a great resource for your more advanced students, or those who are looking to get deeper into digital music creation.

  • Musescore: https://musescore.org/en This is more of an app than a webpage, but it’s a free notation and composition software. Once again, a bit more advanced—think free version of Sibelius or Finale. I’d recommend this software if you have students wanted to write music of a more classical genre. There is playback included, but the instrument quality isn’t incredible. Still, a great resource to have in a back pocket!

Try it out!

Technology is here to stay, and its integration into education and music is going to continue to increase. Might as well make the best of it and enjoy the process! There are many other options out there for digital composition: Audacity, Garageband, and Protools, to name a few. Use whatever works best for you, and have fun with it! You might just learn a thing or two yourself along the way.


If you are interested in any of the resources I’ve used in lessons and classes myself, feel free to contact me at my Vibe email. I’m always delighted to share. Happy composing!


-Charissa Garrigus, Instructor at Vibe Music Academy